If you have an existing Xamarin.Forms app that was not built with Xamarin.Forms Shell, this article is here to help highlight the changes needed to update your app to use Shell.
What is Shell?
The release of Xamarin.Forms 4.0 brought with it the official arrival of Xamarin.Forms Shell. Xamarin.Forms Shell aims to simplify and improve the developer experience around creating mobile applications. These improvements range from streamlining the creation of the UI navigation views to providing a powerful navigation approach using URIs.
Shell features
Xamarin.Forms Shell offers many features; this article focuses on a subset of those features, including:
- Easily create common navigation views: Tabs and flyout menus are some of the most common UI navigation elements used in mobile applications. Xamarin.Forms Shell makes it easy to implement both UI views as well as customize the views to match the theme of an app. However, when the standard tabs and flyouts aren’t enough, custom renderers can be used to provide a truly unique and customized UI for either Android or iOS.
- URI navigation: Shell applications can utilize a URI-based navigation scheme that uses routes to navigate to any page in the application. Unlike traditional Xamarin.Forms navigation, these routes do not require having to follow a set navigation hierarchy. By being able to utilize URIs for navigation, deep navigation can be implemented to allow precise navigation to specific pages in an app.
- Integrated Search: Shell includes a search feature that integrates directly into the layout of a page.
Convert an existing app
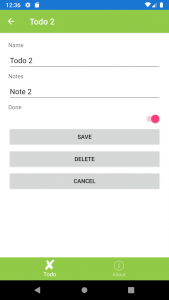
Let’s convert a simple app from the Xamarin GitHub account, the Todo app.
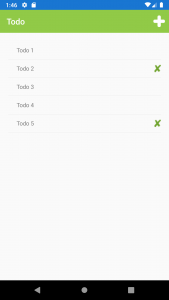
The Todo app is a great sample app to work with due to its simplicity and ability to showcase several Shell features, including:
- Shell class
- Tabs
- Routes
- Navigation
- Search
A converted version of the Todo App is available here. Let’s go!
Setup platforms
Android and iOS natively support Shell; however, Shell is only experimental on UWP. Given this, the walkthrough below will not include steps for implementing Shell on the UWP platform. For this example, the UWP project can be removed from the Todo solution so the focus is on the Android and iOS projects.
Before writing any code, the Xamarin.Forms, Android, and iOS applications should be updated to have the latest NuGet packages. As of this writing, Xamarin.Forms 4.6.0.726 is the current stable version.
Create a subclass of Shell
Once the platform setup is complete, then the process of creating and using the Shell functionality can begin. A Xamarin.Forms Shell application requires the creation of a subclass of the Shell class. Next, utilize the subclass by setting it as the MainPage property of the App class. Let’s create the subclass.
Create a XAML file named AppShell.xaml. Replace XAML content with:
<?xml version="1.0" encoding="UTF-8"?>
<Shell xmlns="http://xamarin.com/schemas/2014/forms"
      xmlns:x="http://schemas.microsoft.com/winfx/2009/xaml"
      xmlns:d="http://xamarin.com/schemas/2014/forms/design"
      xmlns:mc="http://schemas.openxmlformats.org/markup-compatibility/2006"
      mc:Ignorable="d"
      xmlns:todo="clr-namespace:Todo"
      Title="TodoShell"
      x:Class="Todo.AppShell">

   <!--
       Styles and Resources
   -->
   <Shell.Resources>
       <ResourceDictionary>
           <Color x:Key="NavigationPrimary">#91CA47</Color>
           <Style x:Key="BaseStyle" TargetType="Element">
               <Setter Property="Shell.BackgroundColor" Value="{StaticResource NavigationPrimary}" />
               <Setter Property="Shell.ForegroundColor" Value="White" />
               <Setter Property="Shell.TitleColor" Value="White" />
               <Setter Property="Shell.DisabledColor" Value="#B4FFFFFF" />
               <Setter Property="Shell.UnselectedColor" Value="#95FFFFFF" />
               <Setter Property="Shell.TabBarBackgroundColor" Value="{StaticResource NavigationPrimary}" />
               <Setter Property="Shell.TabBarForegroundColor" Value="White"/>
               <Setter Property="Shell.TabBarUnselectedColor" Value="#95FFFFFF"/>
               <Setter Property="Shell.TabBarTitleColor" Value="White"/>
           </Style>
           <Style TargetType="TabBar" BasedOn="{StaticResource BaseStyle}" />
       </ResourceDictionary>
   </Shell.Resources>

   <!-- Tabs Pages go below -->

</Shell>
Replace the code-behind contents with:
using Xamarin.Forms;
using Xamarin.Forms.Xaml;

namespace Todo
{
    [XamlCompilation(XamlCompilationOptions.Compile)]
    public partial class AppShell : Xamarin.Forms.Shell
    {
        public AppShell()
        {
            InitializeComponent();
            RegisterRoutes();
            BindingContext = this;
        }

        // Code below

    }
}
Finally, the navigation code in App.xaml.cs can be replaced. Find the code below:
var nav = new NavigationPage(new TodoListPage());
nav.BarBackgroundColor = (Color)App.Current.Resources["primaryGreen"];
nav.BarTextColor = Color.White;

MainPage = nav;
And replace it with:
MainPage = new AppShell();
In the previous steps, a new class was created that will have Shell UI and logic code added to it. The previous steps also included replacing the MainPage property of the Xamarin.Forms Application set to the new Shell class.
Add tabs
For this app update, tabs will be created. To start that update, the XAML in AppShell.xaml will need to be replaced. Find the comment:
<!-- Tabs Pages go below -->
Replace it with:
<!-- Tabs Pages -->
<TabBar>
    <Tab Icon="check.png"
         Title="Todo">
        <ShellContent  ContentTemplate="{DataTemplate todo:TodoListPage}"
                       Route="todo"/>
    </Tab>
    <Tab Icon="info.png"
         Title="About">
        <ShellContent ContentTemplate="{DataTemplate todo:AboutPage}"
                      Route="info"/>
    </Tab>
</TabBar>
Shell makes it incredibly easy to add tab navigation to an application, but what exactly was the commented code replaced with? Let’s take a closer look.
The TabBar view is the container for the tabs. The Tab object defines a tab in the UI and has properties for icon and title values. The tabs will appear at the bottom of the app. If only one Tab object is defined, the Shell will treat the tab as a single page view with no tab UI displayed. The Tab object can contain a collection of ShellContent objects. A ShellContent object can contain a single ContentPage, which would ultimately be displayed within a tab. Directly placing a ContentPage inside of a ShellContent object can lead to poor app performance. This is because ShellContent objects will create any ContentPage objects it contains during application startup. To improve the startup experience of the app, the ContentTemplate property of ShellContent is used, and a DataTemplate value is set with a ContentPage. The ContentTemplate approach takes advantage of Shell’s ability to create pages on demand in response to navigation operations.
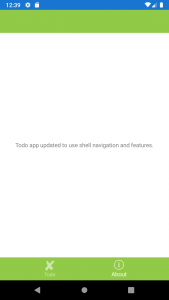
The code snippet above included a tab for the Todo page and a new About page. Let’s create the About page. To start, create a new XAML page called AboutPage in the views directory in the Todo project. Ensure the namespace for the new view is set to Todo. Once the page has been created and the namespace set, the XAML can be updated. Replace the Label in AboutPage.xaml with:
<Label Text="Todo app updated to use shell navigation and features."
       VerticalOptions="CenterAndExpand"
       HorizontalOptions="CenterAndExpand" />
And the cherry on top is adding an icon for the About tab. Download info.png and add it to the Android and iOS projects per platform’s specific image locations.
Add routes
With XAML for the tabs created, it’s time to add routes to the AppShell.xaml.cs code-behind file. In the code-behind file, replace the text:
// Code below
With:
// Application navigation URIs
void RegisterRoutes()
{
    Routing.RegisterRoute("todo/todoItem", typeof(TodoItemPage));
    Routing.RegisterRoute("todo/todoList", typeof(TodoListPage));
    Routing.RegisterRoute("info/about", typeof(AboutPage));
}
Routes must be registered in order to navigate to the different pages in the application. A route can be composed of three parts; the route URI, the page, and the query parameters. The code above demonstrates how a specific route is associated with a specific page in the app. Query parameters are used later in the app.
Update navigation
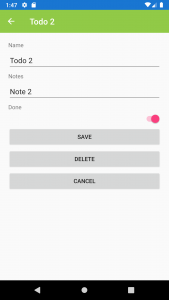
Navigation operations are implemented in Shell using an approach similar to using the Navigation object currently in Xamarin.Forms. The main difference being that Shell takes advantage of URIs instead of specifying ContentPage classes. Let’s replace the code used to navigate to the Todo Details page.
In TodoListPage.xaml.cs find the code:
await Navigation.PushAsync(new TodoItemPage
{
    BindingContext = new TodoItem()
});
Replace it with:
await Shell.Current.GoToAsync("todo/todoItem");
The code that will be replaced next is used to pop pages off the navigation stack.
In TodoItemPage.xaml.cs, the first step is to replace the using statements at the top of the class. Find the code:
using System;
using Xamarin.Forms;
Replace it with:
using System;
using System.Linq;
using System.Threading.Tasks;
using Xamarin.Forms;
Next, replace all instances of:
await Navigation.PopAsync();
With:
await Shell.Current.Navigation.PopAsync();
Passing Data
In the TodoListPage.xaml.cs code-behind file, find the method, OnListItemSelected(object sender, SelectedItemChangedEventArgs e). In this method replace the code below:
await Navigation.PushAsync(new TodoItemPage
{
    BindingContext = e.SelectedItem as TodoItem
});
With this code:
var selectedItem = e.SelectedItem as TodoItem;
await Shell.Current.GoToAsync($"//todo/todoItem?itemid={selectedItem?.ID}");
The replacement code introduces the last part of a Shell route; the query parameter. This replacement code is very different from the original code because Shell doesn’t currently have a means of passing objects during navigation. To compensate for this difference, an identifier is passed as a query parameter that the navigated to page can access. This requires some changes in the TodoItemPage.xaml.cs code-behind file.
First, add the following class attribute above the TodoItemPage class:
[QueryProperty("ItemId", "itemid")]
Next, add the following code inside the class TodoItemPage:
private int? _id;

public string ItemId
{
    set
    {
        var idString = Uri.UnescapeDataString(value);
        var isParsed = int.TryParse(idString, out int id);

        _id = isParsed ? id : (int?) null;
    }
}

protected override async void OnAppearing()
{
    base.OnAppearing();

    await SetBindingContext();
}

private async Task SetBindingContext()
{
    if (_id.HasValue)
    {
        var dbItems = await App.Database.GetItemsAsync();
        BindingContext = dbItems.FirstOrDefault(x => x.ID == _id.Value);
    }
    else
    {
        BindingContext = new TodoItem();
    }
}
The code above attempts to extract the query parameter itemid – if it exists – and use that value to find a matching todo item.
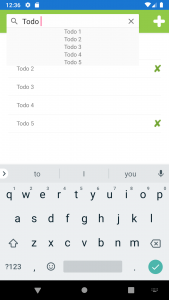
Integrated Search
Time to add another completely new feature to the Todo app; the ability to search. To utilize the integrated search, create a new class that is a subclass of the SearchHandler class. Create a new directory called Controls in the Todo project, and create a new C# file named TodoItemSearchHandler. Replace the contents of TodoItemSearchHandler with:
using System.Linq;
using System.Threading.Tasks;
using Xamarin.Forms;

namespace Todo.Controls
{
    public class TodoItemSearchHandler : SearchHandler
    {
        protected override async void OnQueryChanged(string oldValue, string newValue)
        {
            base.OnQueryChanged(oldValue, newValue);

            await QueryItems(oldValue, newValue);
        }

        protected override async void OnItemSelected(object item)
        {
            base.OnItemSelected(item);

            await Task.Delay(1000);

            var id = ((TodoItem) item).ID;

            // Note: strings will be URL encoded for navigation
            await Shell.Current.GoToAsync($"//todo/todoItem?itemid={id}");
        }

        private async Task QueryItems(string oldValue, string newValue)
        {
            if (string.IsNullOrWhiteSpace(newValue))
            {
                ItemsSource = null;
            }
            else
            {
                var dbItems = await App.Database.GetItemsAsync();

                ItemsSource = dbItems
                        .Where(x => x.Name.ToLower()
                        .Contains(newValue.ToLower()))
                        .ToList();
            }
        }
    }
}
The TodoItemSearchHandler class has several methods that need to be overridden in order to respond to user interactions such as initializing a search and reacting to the user’s selection of a search item.
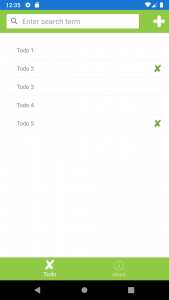
The final step to implementing the search functionality is adding the search handler to the view that will display the search UI. The search handler code will be added to TodoListPage.xaml. In the XAML for TodoListPage.xaml, add the following code as the first object inside of the ContentPage:
<Shell.SearchHandler>
    <controls:TodoItemSearchHandler Placeholder="Enter search term"
                                    ShowsResults="true"
                                    DisplayMemberName="Name" />
</Shell.SearchHandler>
With the addition of search, we have finished adding Shell and its features to the Todo app. You can view the finished app here.
Caveats
Xamarin.Forms Shell is still relatively new. There are some features and platform support that haven’t been fully implemented yet. With that in mind, consider the following caveats before going “all-in” on refactoring your existing application.
- No native support by UWP: In order to use Shell with UWP, it is necessary to set an experimental flag. To enable the experimental flag in UWP, add the following code to
App.csin the UWP project, beforeXamarin.Forms.Forms.Init(e);:
global::Xamarin.Forms.Forms.SetFlags("Shell_UWP_Experimental");
- URL navigation doesn’t support passing objects: If a navigation operation requires the passing of an object, refactor the navigation logic to pass an identifier value, and perform a retrieval of the intended object, post-navigation, based upon the identifier value.
- Navigation from within SearchHandler is time sensitive on iOS: When a search item is selected using the SearchHandler, the
OnItemSelectedmethod is called. TheOnItemSelectedmethod is a great place to execute a navigation operation that goes to the item that was selected. Navigating on Android fromOnItemSelectedworks as expected; however, iOS does not operate in the same way. Upon attempting the navigation operation on iOS, the app will register the selection interaction but remain on the current view. Luckily there is a workaround by adding a slight delay:
await Task.Delay(1000);
The iOS application will navigate to the expected page. As of this writing, the related issue remains open in GitHub:
[Shell, iOS] Navigation from SearchHandler.OnItemSelected override failing
Outro
In this article, we discussed Xamarin.Forms Shell: what it is, its features, and how to update an existing app to utilize those features. Although there are caveats to using Shell at this point, it’s worth considering and evaluating the benefits can bring to your app. Xamarin.Forms Shell is definitely something to keep on the radar as it matures.
Outie 👋🏾
Resources
Enhancement – Shell Navigation with Models #6848
The Model-View-ViewModel Pattern
Xamarin.Forms Shell Page Configuration
Xamarin.Forms Shell Navigation
