There is no doubt that Microsoft’s VS App Center is an incredible resource  for mobile application programmers. The problem is that it seems hard to get started. The good news is that once you get started, it turns out to be wicked easy!
For this blog post, I’m going to assume that you are already sold that App Center is the Cat’s Meow; if not check out this article by Microsoft on why App Center is so cool.
The short version is that App Center allows you to Build your application in the cloud, directly from your repository. You can Test (using Xamarin Cloud) and you can Distribute to beta testers. You can also set up and view analytics and crash reports. Finally, you can set up push notifications.
In the next few blog posts I’ll go over each of these areas, and be sure to keep an eye out for my forthcoming course on App Center on LinkedIn Learning (part of my Azure Essentials series) . You’ll find these posts on Wintellect’s blog and on my own.
Getting Started
There are a number of ways into App Center, but the key thing to understand is that you can use Analytics, Crash Reports and more just by adding a couple lines of set up code to your program. Then it just works.
I like to divide my perspective on App Center into two groups: those things I do locally, and those I do through the App Center portal. We’ll start, however, with the fundamental set up; which will get you started, and which, incidentally, will get you analytics and crash reporting.
To begin, you need an AppCenter account. Go to http://appcenter.ms where you will find the welcome screen. Click on Get Started and create an account. You can sign in to do so using your GitHub, Microsoft, Facebook or Google OAuth account, or you can create a username and password.
Once in, let’s pause and create a local app. I’ll create a basic Xamarin.Forms app in Visual Studio 2017 that I’ll call AppCenterBlogDemo. (Feel free to create whatever kind of app you like). Be sure to check that you want a local Git repo (you can always do this later, but it is easiest to do it when you create the app). Build it and make sure it runs.
Adding A New App
OK, from here you have a lot of options. We’re going to take it one step at a time, over the next few blog posts. Let’s start by going back to App Center and clicking on Add New App.
A dialog slides out, where you can name your new app (I’ll use the same name here: AppCenterBlogDemo) and optionally add a description.
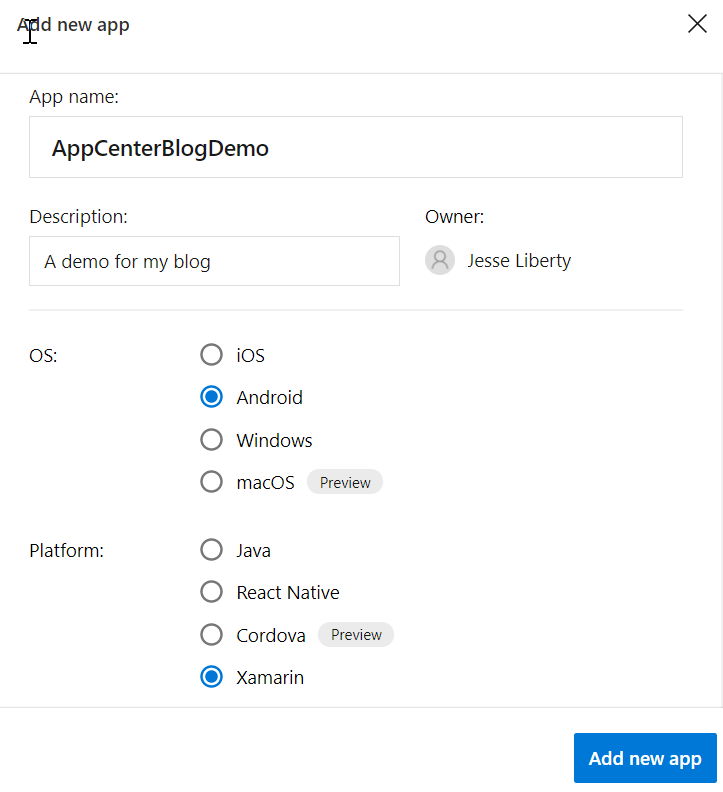
Click Add New App. This takes you to a screen where you can add the sdk to your app. The instructions are precise and easy. The first step is to add the NuGet packages. They tell you (if you are on Windows) to install Microsoft.AppCenter.Analytics and Microsoft.AppCenter.Crashes.
Do the normal NuGet thing (search for App Center, load each package to all projects). Note that Microsoft.AppCenter should be installed automatically as the other two have a dependency on it. After the installation make sure AppCenter was installed; there is a bug and sometimes you have to install Microsoft.AppCenter explicitly.
Now, if you are creating a Xamarin.Forms app, open App.xaml.cs and add these using statements:
using Microsoft.AppCenter;
using Microsoft.AppCenter.Analytics;
using Microsoft.AppCenter.Crashes;
Once done, find OnStart and add this code:
AppCenter.Start("android=axx2a9x7-xxb2x-4a7a-xxxx-2exxc18axxd7;" +
 "uwp={Your UWP App secret here};" +
"ios={Your iOS App secret here}",
 typeof(Analytics), typeof(Crashes));
Because I indicated this was an Android app, I have a “secret” for Android right there in my instructions. No extra work; cool. I now can go back and get one for iOS and/or UWP, but I’m going to stick with just Android for now. Thus, I’ll trim this statement down:
AppCenter.Start("android=a4a2a9b7-xxxxx-4a7a-xxxx-2exxx18a79d7;" ,
 typeof(Analytics), typeof(Crashes));
Notice that we’ve added typeof(Analytics) and typeof(Crashes). That is where the magic is; we’ll be adding to this in later posts. Rebuild in Release mode (App Center only works with Release versions). Run. Done.
That’s It?
That’s all you have to do to get basic Analytics and Crash Reporting working. You can prove this to yourself by running your app; then going to the Analytics tab.  In the upper right corner is a drop down that says Last 30 days; change it to Last 7 days.
Hey! Presto! your sign-on shows.
Of course, the analytics will be much more valuable once you’ve distributed your app to a number of beta testers. Still, clearly, it is working. I find it kind of magical.
Next Steps
Next time we’re going to look at building your app in the cloud using AppCenter. We’ll do that by connecting App Center to your git repo on BitBucket (or Git or VSTS). You’ll then be able to build (and distribute) on demand or everytime a new checkin is pushed to the server. But that’s next time.
